


A workshop kit for making leather baskets proposed by Lileo Store.
You can freely create shapes by combining parts.
There is no complicated work involved, such as sewing, so even children can enjoy it.
This kit will allow you to create at least two different shapes, so please feel free to use your imagination.
-
A basket kit made of leather scraps.
This kit allows you to build a basket on your own by only assembling leather parts.
Suitable for everyone including children, as it does not require any complicated processes such as sewing.

[How to make it]
The contents of the kit are
A: 40 double-hole
B: 10 pieces per hole
C: Short two-hole 10 pieces
D: 4 short three-hole
Handle belt (with rivets) 1 piece
It will be.
-
A kit includes:
A: 40 pcs (with two slots)
B: 10 pcs (with one slot)
C: 10 pcs (with two slots)
D: 4 pcs (with three slots)
1 handle with button stud

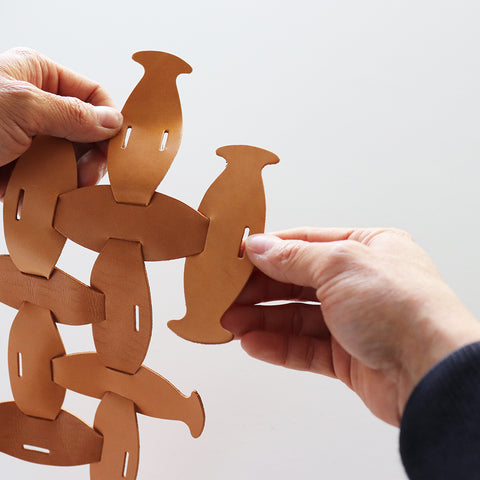
A (two holes) is what makes up the entire body.
The parts are assembled by inserting them from the front to the back of the leather.
-
Connect two parts together by inserting a tab into a slot of another to make a main body using A. Bending the tab edge may help you to do this easily.

It is easier to insert if you fold the protruding part and push it in.

It's a good idea to think about the size and balance from the bottom, imagining what you'll put in it and how you'll hold it.

Create the corners of the bottom by connecting adjacent parts.
-
Form four corners by connecting two parts next to each other, ensuring that each corner makes a right angle.
Connect them to form a triangle.
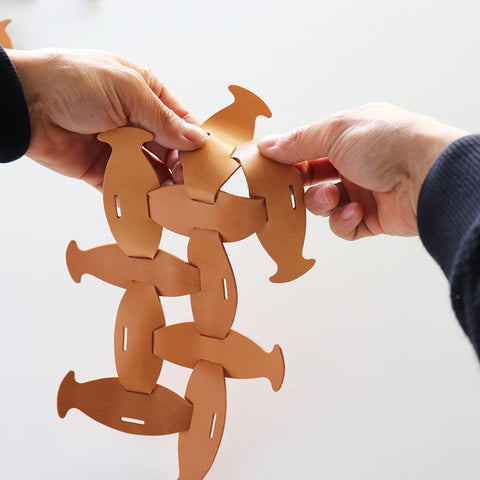
Assemble carefully so that the four corners are not misaligned.

From here, connect the sides and extend them upwards.
-
You then build side faces with the same method using A.

Once you have reached the desired height, it's time to use B (one hole) and C (two short holes).
Once you connect B (one hole) horizontally and C (two short holes) vertically, you'll be close to completion.
-
When at the height you prefer, use B in horizontal and C in vertical alternately to take shape.

Use A (two holes) or D (short three holes) wherever you like to attach the handle.
-
Finally you use A and D to attach a handle and put the handle through the hole.
And then fix the handle using button stud.

Pass the included handle through the hole in the part and secure it by hooking it with a connector.


Finally, place the included drawstring bag inside and it's complete.

For example, camel width 3 rows, depth 3 rows, height 3 rows
Brown Made with 5 rows horizontally, 1 row gusseted, and 3 rows high.


We also recommend using it without a handle and placing it in your room, as shown in the example below.
There are four rows across, two rows with a depth of three, and three rows in height.

Vertical or thin. It might be interesting to mix different sizes and colors.
The remaining parts can be used as replacements when they lose their strength.
Notes:
● As an eco-project, we use scraps generated during production.
There are various individual differences in parts, and some parts may have scratches or uneven color.
Since it is a simple assembly, we cannot guarantee its strength.
Please note that repeated removal and attachment of parts may result in them losing strength.
●The actual product may differ slightly in color and texture from the image shown.
●You may see scratches, blood vessels, or other marks that resemble pores that are inherent to the leather.
●There is a possibility of color fading or color transfer.
●Dirt and stains may occur due to friction or water.
Please understand the above before purchasing.